發表文章

Android Studio 攔截通知欄訊息 看到訊息又不會被標記已讀

圖片
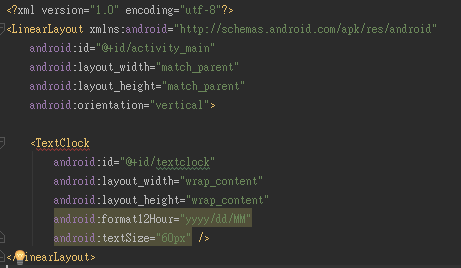
大家好 這次想教大家如何攔截通知欄訊息 他可以實現已讀不回神器的功能 參考APP https://play.google.com/store/apps/details?id=com.anonymtbj.tools.messagemonitor 大家可以下載來使用看看 那現在就直接教大家實現 程式碼 版面配置 首先要我們要在畫面上 顯示攔截到的訊息資訊 至activity_main.xml配置版面 分別顯示 通知的應用程式小圖示 通知的應用程式訊息大圖示 通知的應用程式包名 通知的訊息標題 通知的訊息內容 <? xml version= "1.0" encoding= "utf-8" ?> <LinearLayout xmlns: android = "http://schemas.android.com/apk/res/android" xmlns: app = "http://schemas.android.com/apk/res-auto" xmlns: tools = "http://schemas.android.com/tools" android :layout_width= "match_parent" android :layout_height= "match_parent" tools :context= "com.anonymtbj.tools.notificationmonitor.MainActivity" android :orientation= "vertical" > <TextView android :id= "@+id/smallIcon_text" android :layout_width= "match_par

Android Studio 亂數動畫 快速實現

圖片
大家好 最近小編寫了一個CODE "亂數動畫 " 想與大家分享 裡面不只有亂數動畫  還有亂數器 可不用寫繁雜的代碼來轉寫 "不重複" 及 "排序" 輕輕鬆鬆幾條代碼就可搞定 在這就馬上教大家使用 使用此code開發的APP https://play.google.com/store/apps/details?id=com.color.lotto.lotto 前置動作 使用前我們必須先加入小編撰寫的模組 在左手邊的Projecr裡有兩個檔案需要加入代碼 build.gradle(Project:Myapplication) build.gradle(Module:app) 分別為這兩個檔案 首先開啟 build.gradle(Project:Myapplication) 加入 maven { url 'https://jitpack.io' } 再來開啟 build.gradle(Module:app) 加入 compile 'com.github.AnonymTBJ:MathBoxView:v1.5' 程式碼 接下來就可以直接上代碼拉! 首先至activity_main.xml加入 <com.anonymtbj.tools.mathboxview.MathBoxView android :layout_width= "match_parent" android :layout_height= "match_parent" > </com.anonymtbj.tools.mathboxview.MathBoxView> activity_main.xml 在至MainActivity.java設定參數 MainActivity.java 參數設定及說明 mathbox .setTextSize( 180 ) ; //文字大小 mathbox .setT

Android Studio 如何快速實現 多功能 LED跑馬燈

圖片
大家好,最近小編寫了一個CODE "多功能的LED " 在GOOGLE PLAY上看到許多 LED ,大多用在演唱會上使用 可這些LED 大多功能都不是很齊全,就想說來寫一個可供大家使用 在這就教大家使用 使用此code開發的APP https://play.google.com/store/apps/details?id=com.concert.led.ledconcert https://play.google.com/store/apps/details?id=com.anonymtbj.tools.ledclock 前置動作 使用前我們必須先加入小編撰寫的模組 在左手邊的Projecr裡有兩個檔案需要加入代碼 build.gradle(Project:Myapplication3) build.gradle(Module:app) 分別為這兩個檔案 首先開啟 build.gradle(Project:Myapplication3) 加入 maven { url 'https://jitpack.io' } 再來開啟 build.gradle(Module:app) 加入 compile 'com.github.AnonymTBJ:MarqueeView:v1.2' 程式碼 接下來就可以直接上代碼拉! 首先至activity_main.xml加入 <com.anonymtbj.tools.marqueeview.MarqueeView android :layout_width= "match_parent" android :layout_height= "match_parent" /> activity_main.xml 直接執行就有會出現LED跑馬燈摟! 執行畫面 執行出來發現是跑馬燈沒錯可是不像LED阿 沒關西,我們需要加入圖片, 及運用一些參數可以

Android Studio 時間文字框 TextClock 教學

圖片
關於時間的文本顯示,Android提供了TextClock。 TextClock的功能更加強大,它不僅能顯示時間, 還能顯示日期;而且支持自定義格式。 程式碼 TextClock 分別能顯示日期跟時間 兩種呈現方式 第一種 首先至activity_main.xml加入TextClockm元件 activity_main.xml <TextCloc k android :id= "@+id/textclock" android :layout_width= "wrap_content" android :layout_height= "wrap_content" android :format12Hour= "yyyy/dd/MM" android :textSize= "60px" /> 執行畫面 把android:format12Hour="yyyy/dd/MM"改成android:format12Hour="h:mm" 就會變成顯示時間 如下圖 兩者可合成一個使用 android:format12Hour="yyyy/dd/MM h:mm" 如下圖 說明  EEEE/yyyy/dd/MM  星期 / 年  /月/日 h:mm  為12小時制 H:mm 為24小時制 時:分 顯示時間的兩種屬性 android:format12Hour 不會顯示上下午,可顯示日期 android:format24Hour 會顯示上下午,不能顯示日期 以上屬性也可以在代碼中運用 setFormat24Hour("yyyy-MM-dd hh:mm") setFormat12Hour("yyyy-MM-dd hh:mm") MainActivity.java public class MainActivity extends AppCompatActivity { TextClock textc

Android Studio 清單 ListView 教學

圖片
ListView是開發Android相當常用的清單元件之一, 它能把數據用清單方式顯示出來, 而ListView必須利用Adapter將資料載入, Adapter是負責管理ListView每一列的資料與畫面。 這裡會介紹ListView的基本用法。 程式碼 首先至activity_main.xml創建ListView元件。 activity_main.xml <ListView android :id= "@+id/list" android :layout_width= "match_parent" android :layout_height= "match_parent" /> 在至MainActivity.java新增資料 創建一個陣列放置資料 再透過ListAdapter 來加入至ListView MainActivity.java public class MainActivity extends AppCompatActivity { ListView listView ; String[] values = new String[]{ "蘋果" , "香蕉" , "葡萄" , "水梨" } ; @Override protected void onCreate (Bundle savedInstanceState) { super .onCreate(savedInstanceState) ; setContentView(R.layout. activity_main ) ; listView = (ListView) findViewById(R.id. list ) ; ListAdapter adapter = new ArrayAdapter<>( this , andr